以下是用 solitude 主题部署 hexo 的 GitHub Actions 的 yml 文件:
1
2
3
4
5
6
7
8
9
10
11
12
13
14
15
16
17
18
19
20
21
22
23
24
25
26
27
28
29
30
31
32
33
34
35
36
37
38
39
40
41
42
43
44
45
46
47
48
49
50
51
52
53
54
55
56
57
58
59
60
61
62
63
64
65
66
67
68
69
70
71
72
73
74
75
76
77
78
79
80
81
82
83
84
85
86
87
88
89
|
name: Deploy
on:
push:
branches:
- main
workflow_dispatch:
jobs:
build:
runs-on: ubuntu-latest
steps:
- name: 1. 检出仓库
uses: actions/checkout@v2
with:
ref: main
- name: 2. 安装 Node.js
uses: actions/setup-node@v3
with:
node-version: "16.x"
- name: 3. 安装 Hexo
run: |
export TZ='Asia/Shanghai'
npm install hexo-cli -g
- name: 4. 缓存 Node 插件
uses: actions/cache@v3
id: cache-npm
env:
cache-name: cache-node-modules
with:
path: node_modules
key: ${{ runner.os }}-build-${{ env.cache-name }}-${{ hashFiles('**/package-lock.json') }}
restore-keys: |
${{ runner.os }}-build-${{ env.cache-name }}-
${{ runner.os }}-build-
${{ runner.os }}-
- name: 5. 安装依赖
if: steps.cache-npm.outputs.cache-hit != 'true'
run: |
npm install gulp-cli -g
npm install --save
npm install hexo-renderer-pug
- name: 6. 生成静态文件
run: |
hexo clean
hexo generate
hexo algolia
gulp
- name: 7. 部署到 github page
uses: JamesIves/github-pages-deploy-action@v4
with:
token: ${{ secrets.GITHUBTOKEN }}
repository-name: ${{ secrets.GITHUBUSERNAME }}/${{ secrets.GITHUBUSERNAME }}.github.io
branch: main
folder: public
commit-message: "${{ github.event.head_commit.message }} updated By Github Actions"
|
前置条件:
- 要新建一个私有仓库 hexo_blog 来存放未解析前的 Hexo 博客文件夹
- 然后把所有文件拷贝进去
- GitHub上面申请actions secret:仓库目录下点击Settings->Actions->New repository secret
- 添加三个参数 :SERVER_PRIVATE_KEY(Github私钥)/GITHUBUSERNAME(Github用户名)/GITHUBEMAIL(Github注册邮箱)
- GitHub私钥(SERVER_PRIVATE_KEY)申请路径:点击账户右上角头像-settings-左下角最下面developer settings-左边点击tokens(classic)-右边generate new token(生成之后期限选择no expiration【不过期】)
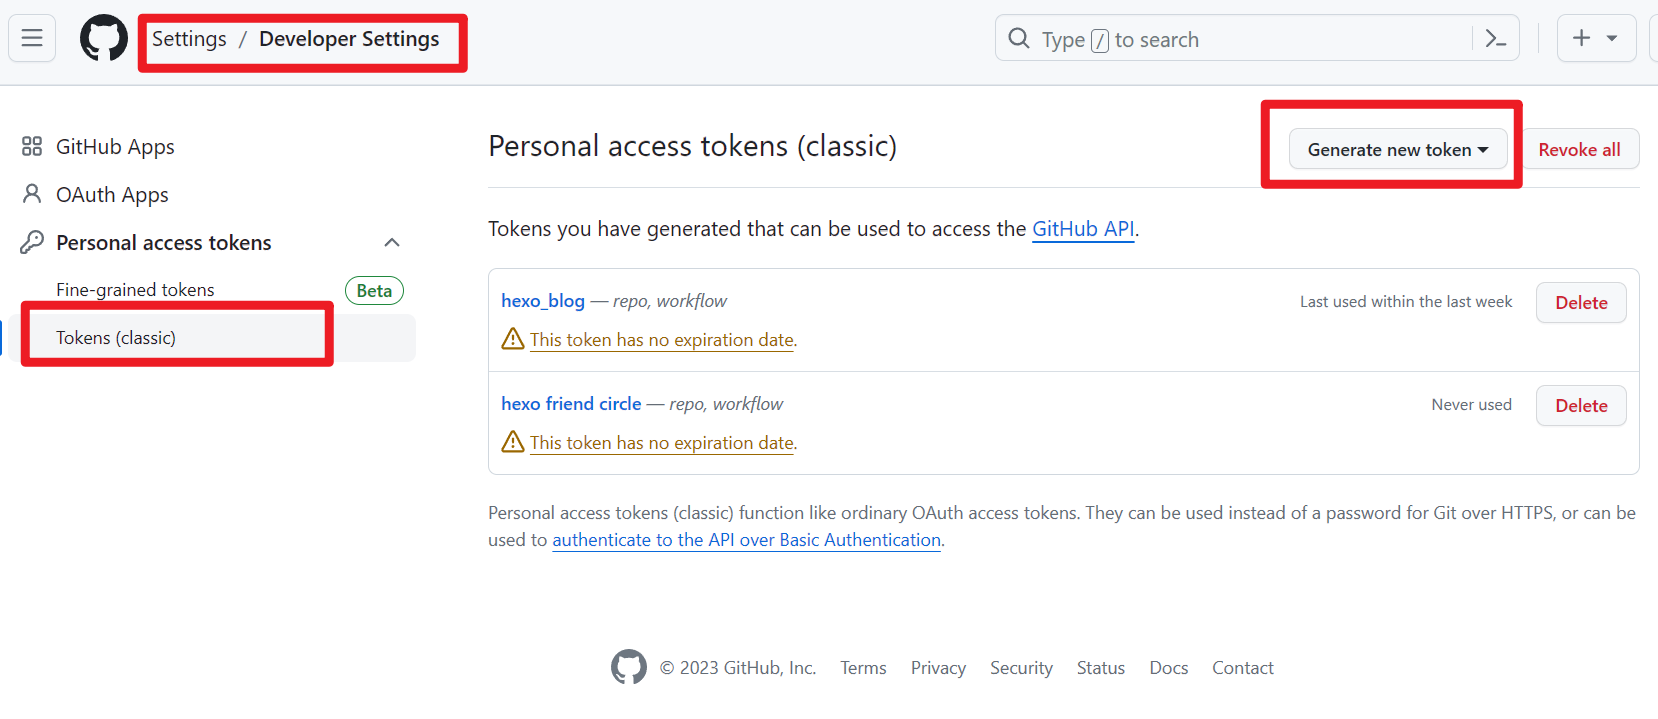
- 注意这个私钥只能显示一次,一定要备份好,在设置actions secret时候会用到
- 一定要把 package-lock.json 文件拷贝进去,这个文件是记录依赖安装的,没有的依赖会通过它重新安装
- 安装依赖的时候出现了 hexo offline 错误提示:
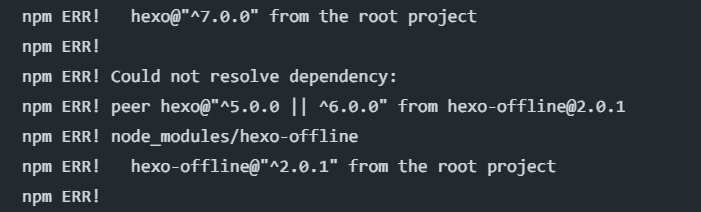
说明:hexo-offline 是 solitude 主题中用于设置 PWA(渐进式 web app)的,不是刚需
解决方法:删除根目录里面 package.json 中关于 offline 的记录 - 生成静态文件时出现错误

解决办法:在根目录建立 gulpfile.js 文件,并写入内容
1
2
3
4
5
6
7
8
9
10
11
12
13
14
15
16
17
18
19
20
21
22
23
24
25
26
27
28
29
30
31
32
33
34
35
36
37
38
39
40
41
42
43
44
45
| var gulp = require('gulp');
var cleanCSS = require('gulp-clean-css');
var htmlmin = require('gulp-html-minifier-terser');
var htmlclean = require('gulp-htmlclean');
var terser = require('gulp-terser');
gulp.task('compress', () =>
gulp.src(['./public/**/*.js', '!./public/**/*.min.js'])
.pipe(terser())
.pipe(gulp.dest('./public'))
)
gulp.task('minify-css', () => {
return gulp.src(['./public/**/*.css'])
.pipe(cleanCSS({
compatibility: 'ie11'
}))
.pipe(gulp.dest('./public'));
});
gulp.task('minify-html', () => {
return gulp.src('./public/**/*.html')
.pipe(htmlclean())
.pipe(htmlmin({
removeComments: true,
collapseWhitespace: true,
collapseBooleanAttributes: true,
removeEmptyAttributes: true,
removeScriptTypeAttributes: true,
removeStyleLinkTypeAttributes: true,
minifyJS: true,
minifyCSS: true,
minifyURLs: true
}))
.pipe(gulp.dest('./public'))
});
gulp.task('default', gulp.parallel(
'compress', 'minify-css', 'minify-html'
))
|
说明:这个插件是用于对代码进行压缩
Reference: 进阶配置 🚀 | Solitude 主题官方文档
改完以上两项之后,autodeploy 成功运行,以后对仓库任何文件的增删改查都会自动部署到 GitHub Pages 中,简直太方便了
Reference: 张时贰-Hexo 博客利用 Github Action 自动化部署